A well-maintained iron is an essential household tool, helping you keep clothes crisp, neat, and professional-looking. However, many people overlook the importance of cleaning their iron regularly. A dirty iron can leave stains, scorch fabrics, or even stop working efficiently. According to thespruce.com, a clean iron glides smoothly, heats evenly, and produces consistent steam—making ironing quicker and more effective.
In Fiji’s humid climate, where mineral deposits and residue from starch or sizing can build up faster, regular iron maintenance is especially important. While how often you clean your iron depends on usage, a good rule of thumb is to flush it at least once every few months and clean the soleplate whenever you notice dullness or residue.
Here is a simple, practical guide to keeping your iron in top condition.
What you’ll need;
Before starting, gather the following:
*A bowl or large cup;
*A wooden or plastic toothpick (or an old toothbrush);
*Distilled white vinegar;
*Distilled water;
*Table salt or baking soda; and
*A clean white cloth
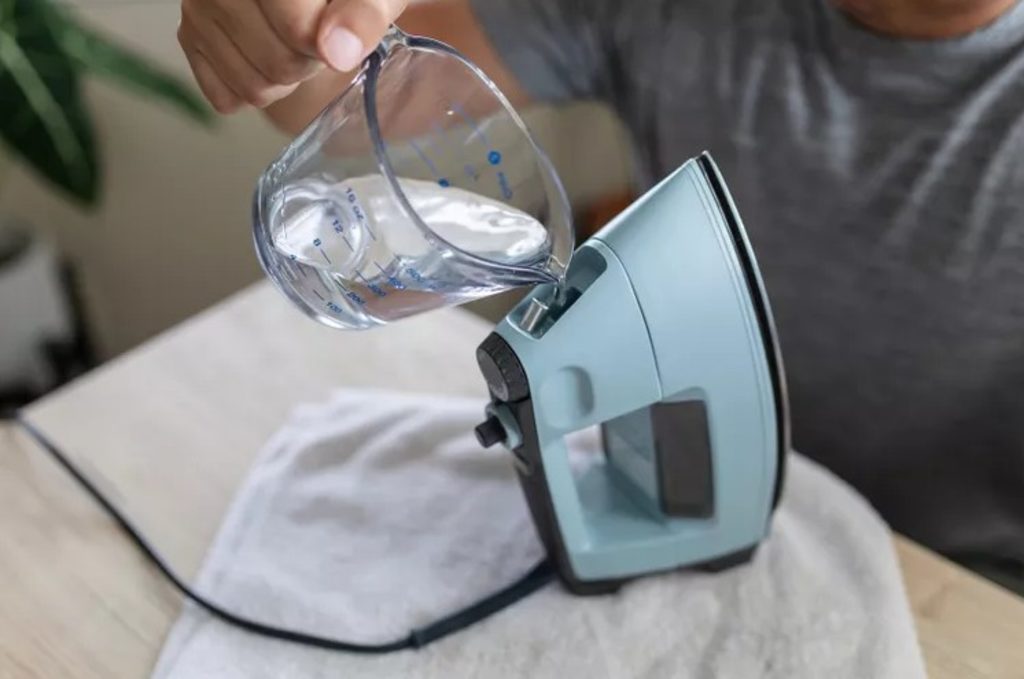
Step 1: Prepare a cleaning solution
Begin by mixing half a cup of distilled white vinegar with half a cup of distilled water. Pour this mixture into the water reservoir of a cool, unplugged iron. This solution helps dissolve mineral deposits that may clog the internal system.
Step 2: Check steam ducts for blockages
Place the iron upright and inspect the steam holes on the soleplate. If you notice white residue or build-up, gently clean the holes using a wooden or plastic toothpick or an old toothbrush.
Avoid using metal objects, as they can scratch and damage the surface.
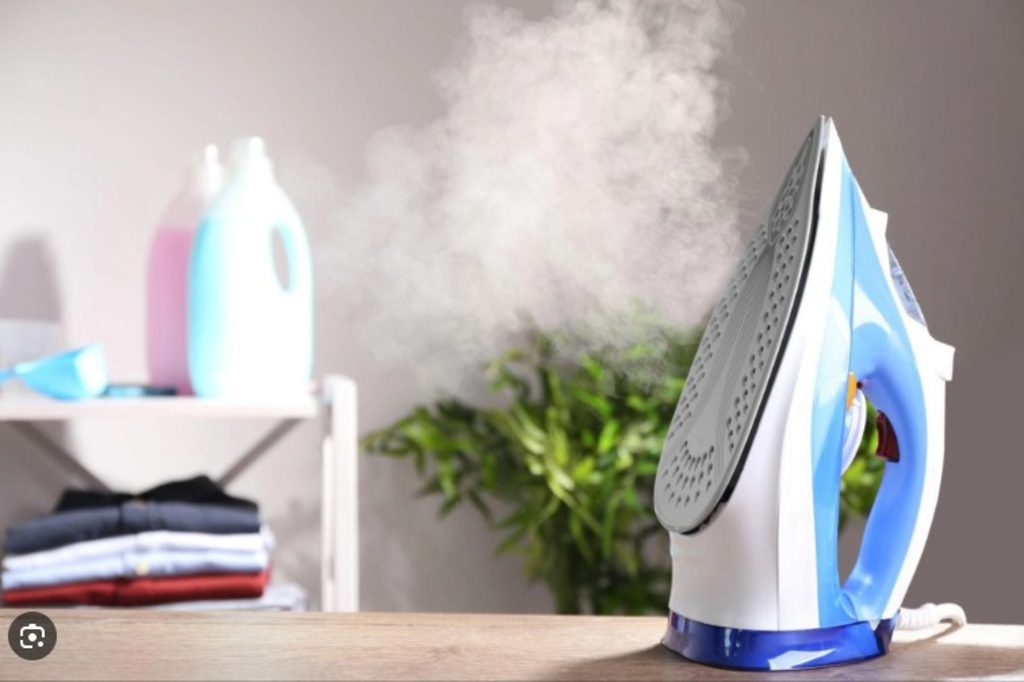
Step 3: Steam it out
Plug in the iron, switch it on, and set it to the steam function. Allow it to heat up for at least five minutes.
Once heated, press and hold the steam button for 20–30 seconds until steam flows freely. Repeat this process several times—about six cycles—to flush out loosened deposits.
Step 4: Empty and cool
Turn off and unplug the iron, allowing it to cool completely. Once cool, empty any remaining liquid from the reservoir. This step prevents leftover vinegar solution from causing corrosion.
Step 5: Clean the soleplate
Over time, the soleplate can become sticky or stained from burnt starch or fabric residue. To clean it safely, mix a small amount of table salt or baking soda with vinegar to form a paste.
Dip a clean cloth into the paste and gently scrub the soleplate. For stubborn stains, allow the paste to sit for about 10 minutes before scrubbing.
Once clean, wipe the surface with a damp cloth and dry thoroughly.
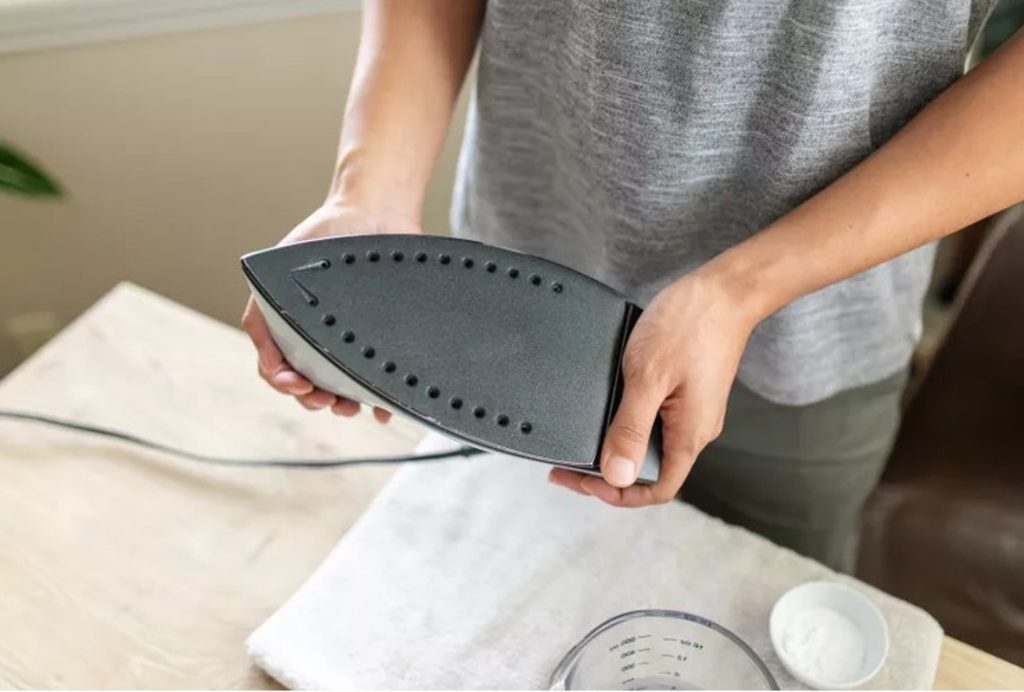
Step 6: Removing melted plastic
If plastic accidentally melts onto your iron, act carefully.
First, unplug the iron and let it cool slightly. Place the affected area on a tray of ice for five to 10 minutes to harden the plastic.
Once hardened, use a blunt plastic tool—like an old credit card—to gently scrape it off. Then, use the same vinegar-based paste to remove any remaining residue. Finish by wiping clean and drying the iron.
Regular maintenance not only extends the life of your iron but also protects your clothing from damage. A clean iron ensures better heat distribution, smoother operation, and spotless results every time.
By setting aside a little time every few months, you can keep your iron performing like new—saving you time, effort, and the frustration of ruined garments.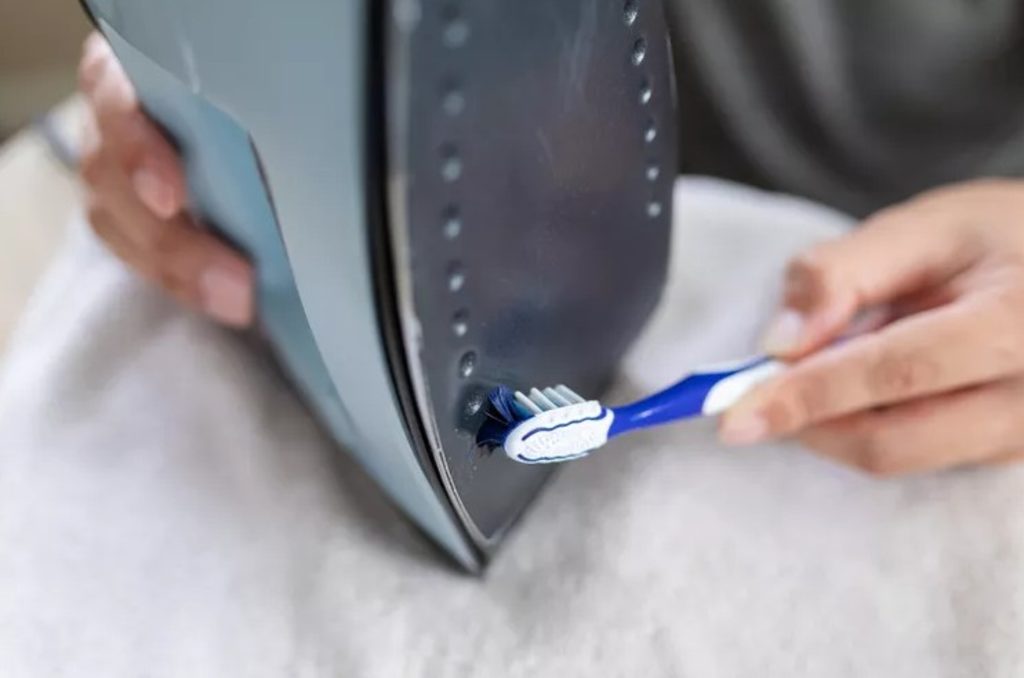
A dirty iron can leave stains, scorch fabrics, or even stop working efficiently.

A well-maintained iron is an essential household tool, helping you keep clothes crisp, neat, and professional-looking. Pictures: GOOGLE
Regular maintenance not only extends the life of your iron but also protects your clothing from damage. Picture: GOOGLE
By setting aside a little time every few months, you can keep your iron performing like new—saving you time, effort, and the frustration of ruined garments. Picture: GOOGLE